Decoration · · 6 min read
Chenille vs 3D Puff Embroidery: Pick the Texture, Then Prepare the Logo
Compare chenille, raised embroidery, flat stitching and appliqué for apparel. Prepare a logo brief and check a sew-out before approval.
By MadeOnBlank guides · Supplier-published guidance
Short answer
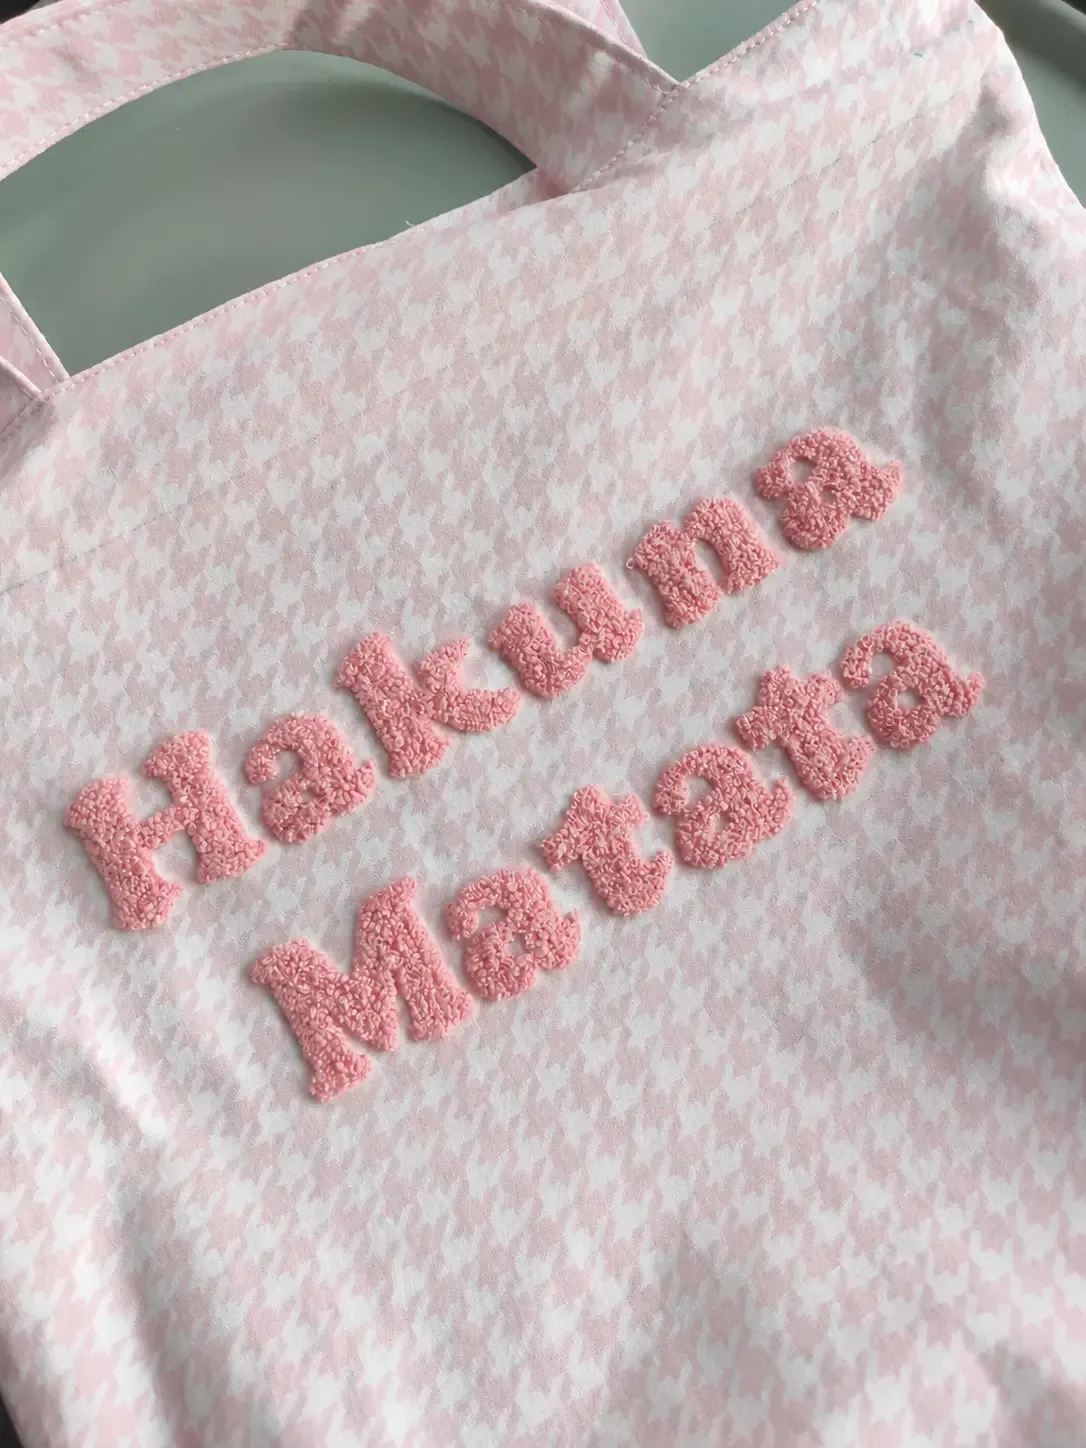
Chenille uses looped or tufted yarn for a piled surface. 3D puff embroidery creates a raised stitched shape, often over foam. Appliqué adds a separate fabric layer. Choose the texture and construction for the logo at its finished size, then review a sew-out on the intended garment.
On this page
“Make the logo 3D” leaves several decisions open. You might mean a fuzzy varsity-style letter, a smooth raised stitched outline, or a fabric letter secured with embroidery. Those can look similar from a distance while feeling very different in use.
Use the texture, edge and garment construction to choose a route. These are general selection notes. A reference image does not establish the backing, yarn, foam or machinery used to make it.
Four routes worth separating
| Route | How to recognize the intended effect | Useful design direction | Main sample questions |
|---|---|---|---|
| Chenille embroidery | Looped or tufted pile | Bold letters and areas where a fuzzy surface is wanted | Pile, outline, gaps, shedding and reverse side |
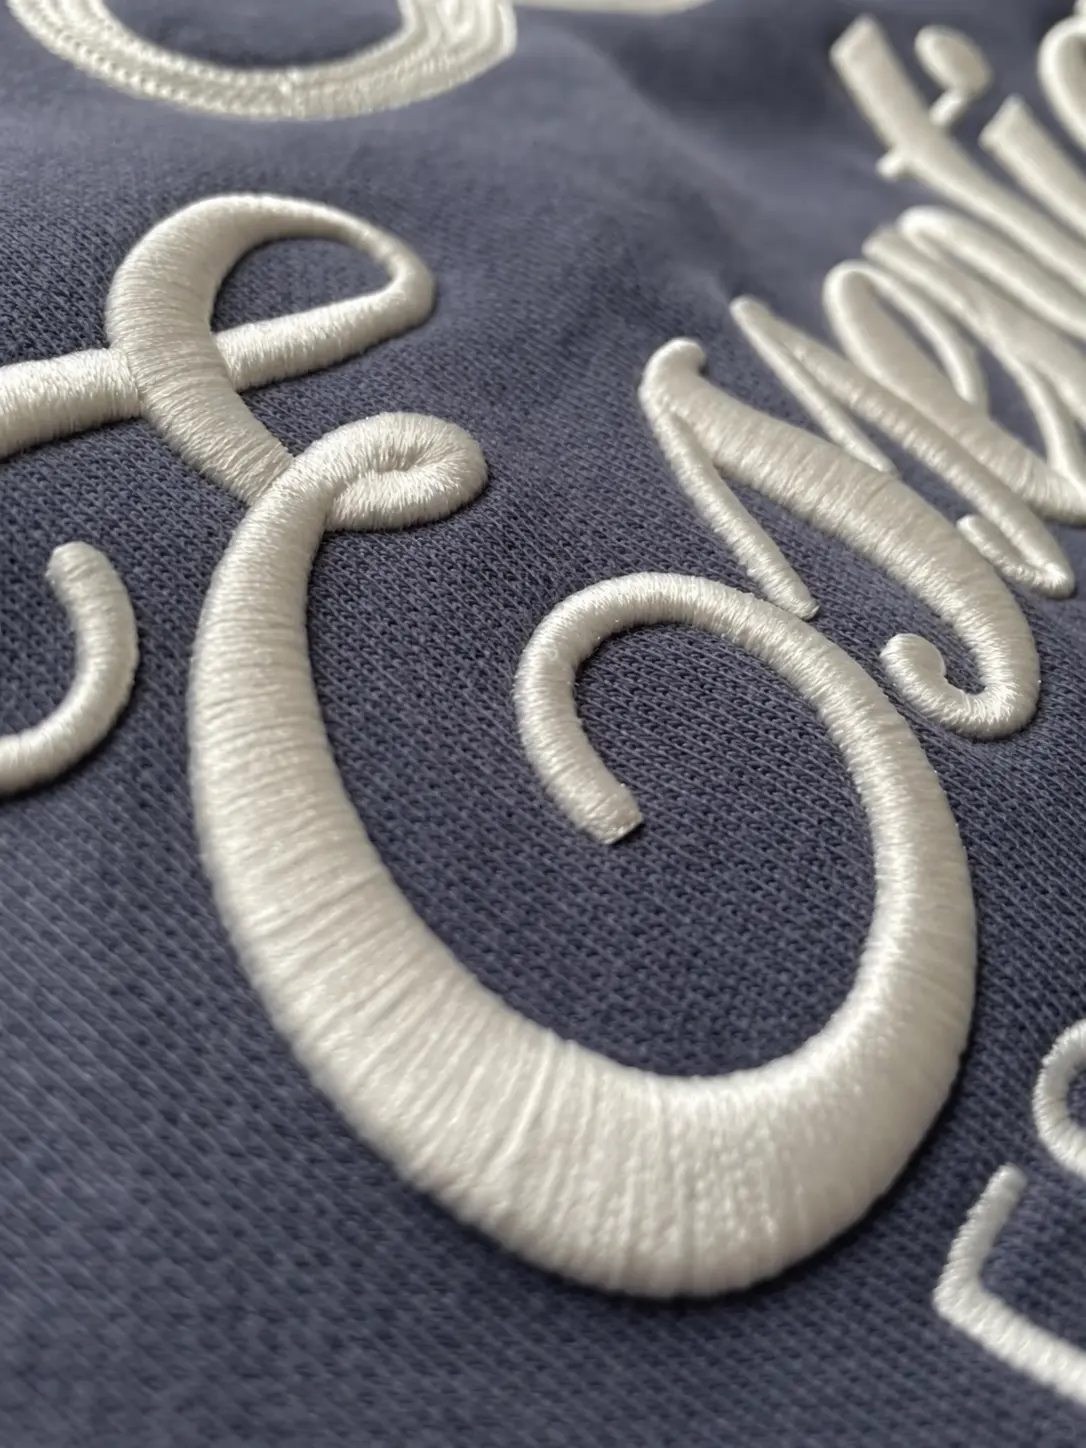
| 3D / puff embroidery | Raised stitches, often over foam | Shapes that can retain covered edges at the chosen size | Build-up, edge coverage, exposed foam and shape |
| Flat embroidery | A relatively low-profile stitched surface | Logos where stitch detail matters more than height | Readability, coverage, puckering and backing |
| Appliqué | Separate fabric held in place, commonly by stitched edges | Larger fabric shapes or contrasting material | Fabric edge, attachment, alignment and combined care behavior |
Chenille can be made as a separate emblem, and appliqué can be combined with other stitches. These are not mutually exclusive catalog categories. State the actual assembly in the approved brief.
What changes when a logo becomes stitches?
A vector outline is not a stitch plan. Digitizing decides how the machine forms and sequences the embroidery. The same logo may need different treatment at different sizes, on a stable woven garment and on a stretchy knit, or in flat work and foam-backed raised work.
Madeira’s 3D-foam guidance specifically calls for an embroidery file adapted to the raised construction. Its thread information also distinguishes yarn applications. These sources explain general inputs; they do not verify the materials used in the photographs here.
Do not set one universal minimum letter size from an image. Tiny counters, narrow outlines and close spacing need a finished-size sew-out with the chosen thread and garment. If the smallest wording is essential, ask whether it should remain flat, become larger or be separated from a textured letter.
Choose the route with three questions
Is a fuzzy surface the main feature? Start with a chenille reference. Specify the pile, the border around it and whether the design is direct or on a separate base. “Soft” is not a complete specification for height, yarn or the inside finish.
Is a smooth raised edge the main feature? Ask for a raised-embroidery assessment. Confirm whether the proposed build-up uses foam and how starts, ends and tight corners will be covered. The raised photo in our library is an appearance reference, not proof of its internal construction.
Is the design mostly a large fabric area? Compare appliqué with a fully stitched fill. Specify the applied material and its edge treatment. A raw-edge appliqué and a closely enclosed edge are different approved targets, especially after care.
Prepare a brief the sample team can use
Send the garment reference and color, current artwork, finished width and height, placement, thread-color references, desired texture and quantities. Add a close-up that shows the target edge and an overall view that shows scale. Specify direct embroidery, a sewn patch or another attachment route if known; otherwise ask for a recommendation.
For the reverse side, say whether the garment will touch skin and identify any finish requirement. Backing, exposed threads and trim quality can affect comfort. A neat front photograph cannot confirm the back.
Use the embroidery sample brief to keep the unanswered items visible. The technical team should confirm stitch and material decisions. Buyers should not approve guessed machine settings to make the form look complete.
Check a sew-out before approving the garment
- Confirm the artwork version and finished size. Check small letters and open spaces against the intended logo.
- Inspect the texture from front and side views. For a raised target, check edges and corners; for pile, check coverage and loose material.
- Lay the garment naturally. Look for puckering, distortion and an area that pulls the fabric out of shape.
- Inspect the reverse, backing edges, loose threads and the patch attachment where applicable.
- Check placement against an agreed garment point, including its relationship to seams and pockets.
- Complete the agreed care checks. Record changes in the garment, thread, appliqué and backing rather than approving the front appearance alone.
When the reference and sew-out differ, describe the difference precisely: “the lower lettering closes at this size” is more useful than “not premium enough.” Keep photos with scale, the sample version and the written response. The sample approval checklist explains how to separate a mockup, a physical sample and production authorization.
Explore the embroidery references, or send a brand or batch brief. Embroidery setup, quantities, material suitability and timing require their own review; they do not automatically follow the single-piece printing options.
If the embroidery also requires a new garment pattern, fabric or construction, see Meiting Garments’ embroidery development scope. That manufacturing route has its own feasibility, sampling and quantity review. An embroidery reference does not make every texture available as single-piece POD.
Common questions
Is chenille the same as 3D puff embroidery?
No. Chenille has a looped or tufted yarn surface. Foam-backed puff embroidery raises a stitched shape. Both can add volume, but they need different construction and digitizing decisions.
Can embroidery be made directly on a hoodie instead of as a patch?
Some designs can use direct embroidery; others may use a separate patch or appliqué base. Confirm the route, backing, edge, attachment and reverse-side finish for the actual garment.
Does a vector logo count as a ready embroidery file?
No. A vector file describes shapes. An embroidery file also controls stitches and their sequence. Digitizing must account for the design size, thread, fabric and intended effect, followed by a sew-out.
Can a photo prove that raised embroidery contains foam?
No. A photo shows the visible stitched profile. Confirm the construction with the production specification and actual sample; raised work can use different build-ups.
Sources & scope
General embroidery-construction comparison and an original sample brief. Visible texture is separated from unverified internal construction and product-specific results.
- Madeira: dimensional embroidery with 3D foam
General raised-embroidery construction and adapted digitizing; does not identify the construction in a reference photograph.
- Madeira USA: yarn applications for chenille and chain stitch
Examples of yarn applications. Supplier material properties and certifications are not transferred to our garments.
Technical reviewer: pending confirmation. Use the guide to prepare your brief. Product and process approval still requires the actual garment, artwork and order review.
Publishing team, evidence standards & corrections →